BBQ Bacon Dog: A Savory Delight That’ll Ignite Your Taste Buds!

Welcome to our delectable blog post, where we’re about to embark on a tantalizing journey of flavors with the BBQ Bacon Dog—a mouthwatering creation that will take your taste buds on a thrilling adventure! Brace yourself for an explosion of savory bliss as we delve into the art of crafting this irresistible treat, combining the smokiness of grilled hot dogs, the crispy allure of bacon, and the tangy allure of barbecue sauce.

In this blog post, we will guide you through every step of the process, revealing the secrets to crafting the perfect BBQ Bacon Dog. From selecting the finest quality hot dogs and bacon to achieving the ideal level of smokiness on the grill, we leave no stone unturned in our quest for culinary excellence. We’ll even share tips on toasting the buns to perfection and creating your own signature barbecue sauce.

So, get ready to embark on a savory adventure for preparing BBQ Bacon Dog that will leave you craving the unmatched satisfaction of the BBQ Bacon Dog. Indulge in a delight that is sure to become a favorite among your family and friends. Are you ready to experience the harmonious symphony of flavors that awaits? Let’s dive in!

BBQ Bacon Dog

Ingredients:

  • Hot dogs (choose your favorite brand)
  • Bacon strips (one strip per hot dog)
  • Hot dog buns
  • Barbecue sauce (store-bought or homemade)
  • Optional toppings: diced onions, shredded cheese, relish, etc.

Equipment:

  • Grill (gas, charcoal, or electric)
  • Tongs
  • Skillet or frying pan
  • Oven or toaster oven
  • Mixing bowl
  • Whisk or spoon for sauce preparation

Instructions for Preparing BBQ Bacon Dog:

  1. Preheat your grill to medium heat.
  2. Prepare the bacon by either frying it in a skillet over medium heat until crispy or baking it in the oven at 400°F (200°C) for about 15-20 minutes.
  3. While the bacon is cooking, make sure the hot dog buns are fresh. If they’re not already pre-sliced, use a knife to slice them open lengthwise, but leave one side intact to create a hinge.
  4. Preheat your oven or toaster oven to around 350°F (175°C).
  5. Once the bacon is cooked and crispy, remove it from the pan or oven and set it aside.
  6. Place the hot dogs on the preheated grill and cook them for about 5-7 minutes, turning occasionally until they are heated through and have nice grill marks.
  7. While the hot dogs are grilling, take the sliced buns and place them in the preheated oven or toaster oven for a few minutes, until they become lightly toasted. Be careful not to over-toast them; you want them to be slightly crisp on the outside while remaining soft on the inside.
  8. Remove the buns from the oven and set them aside.
  9. Once the hot dogs are done, wrap each one with a strip of the crispy bacon.
  10. Place the bacon-wrapped hot dogs into the toasted buns, gently pressing down to secure them.
  11. Prepare your barbecue sauce. If using store-bought, simply pour it into a small bowl. If making your own, mix together your favorite barbecue sauce with additional ingredients like brown sugar, Worcestershire sauce, garlic powder, and a touch of hot sauce. Adjust the flavors to your liking.
  12. Drizzle the barbecue sauce over the bacon-wrapped hot dogs, and add any desired toppings, such as diced onions, shredded cheese, or relish.
  13. Serve your BBQ Bacon Dogs immediately while they’re still hot and enjoy the explosion of flavors!

Tips for Toasting Buns to Perfection:

Tips for Toasting Buns to Perfection
  • Adjust your oven or toaster oven temperature and timing based on their individual settings. Keep a close eye on the buns to prevent burning.
  • If you prefer a softer bun, skip the toasting step and serve them as is.
  • For extra flavor, you can lightly butter the buns before toasting them.
  • Don’t assemble the hot dogs in the buns until the buns are toasted to maintain their crispness.

Creating Your Signature Barbecue Sauce:

Creating Your Signature Barbecue Sauce:
  • Experiment with different combinations of spices, such as paprika, cayenne pepper, or mustard powder, to add an extra kick to your sauce.
  • Adjust the sweetness by adding more brown sugar or a splash of honey.
  • For a tangier flavor, consider adding a squeeze of fresh lemon juice or a dash of apple cider vinegar.
  • Allow the sauce to sit for a while to allow the flavors to meld together before using it on your BBQ Bacon Dogs.

Now, gather your ingredients, fire up the grill, and prepare to indulge in the incredible BBQ Bacon Dog—a savory delight that will leave you craving more. Get creative with your toppings and sauce, and enjoy this explosion of flavors that’ll surely ignite your taste buds. Happy grilling!


Mouthwatering Grilled Vegetable Panini: The Perfect Healthy Sandwich Option

Welcome to our recipe blog, where we strive to tantalize your taste buds and inspire you to create delicious and nutritious meals. In today’s post, we are delighted to share with you a recipe that perfectly embodies the combination of flavor and health: the mouthwatering grilled vegetable panini. This delectable sandwich is not only a feast for the senses but also a fantastic option for those seeking a wholesome and satisfying meal.

Not only does this mouthwatering grilled vegetable panini please your palate, but it also nourishes your body with an abundance of vitamins, minerals, and fiber. It’s a fantastic way to incorporate a variety of vegetables into your diet, promoting overall health and well-being. Whether you’re a vegetarian, vegan, or simply looking to add more plant-based meals to your repertoire, this sandwich is a nutritious and satisfying choice.

So, join us on this culinary adventure as we guide you through the steps to create the perfect healthy grilled vegetable panini. From selecting the freshest ingredients to mastering the art of grilling, we will provide you with tips and tricks to ensure your panini turns out absolutely scrumptious.

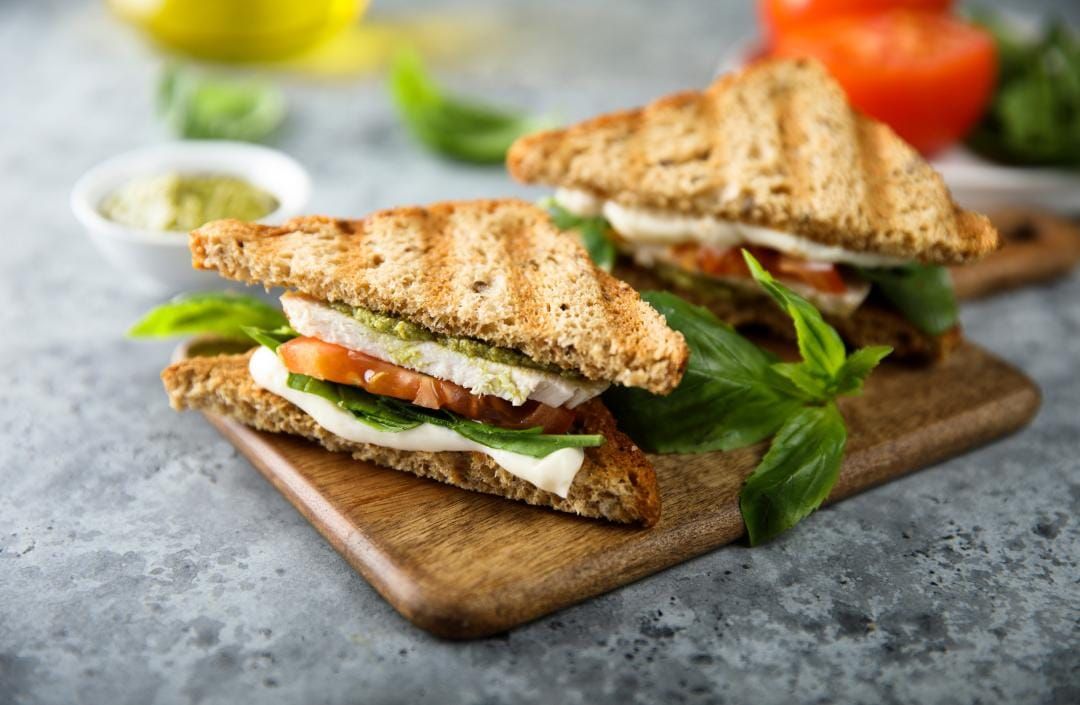
grilled vegetable panini
A Wholesome Bite: Grilled Vegetable Panini. ?

Ingredients:

  • 1 small zucchini, sliced lengthwise
  • 1 red bell pepper, seeded and sliced
  • 1 yellow bell pepper, seeded and sliced
  • 1 small eggplant, sliced into rounds
  • 1 red onion, sliced into rings
  • 4 slices of your favorite bread (such as ciabatta or sourdough)
  • Olive oil for brushing
  • Salt and pepper to taste
  • Optional: fresh basil leaves for garnish

Equipment:

  • Grill pan or outdoor grill
  • Panini press or sandwich press

Instructions:

  1. Preheat your grill pan or outdoor grill to medium-high heat.
  2. Drizzle the sliced zucchini, bell peppers, eggplant, and red onion with olive oil, and season with salt and pepper.
  3. Place the vegetables on the grill and cook for about 3-4 minutes per side, or until they have grill marks and are tender.
  4. Remove the grilled vegetables from the heat and set aside.
  5. Preheat your panini press or sandwich press.
  6. Take two slices of bread and brush one side of each slice with olive oil.
  7. On the non-oiled side of one slice, layer the grilled vegetables, arranging them evenly.
  8. Top with the second slice of bread, oiled side facing up.
  9. Place the assembled sandwich onto the preheated panini press and close the lid gently.
  10. Cook for about 3-4 minutes, or until the bread is toasted and the cheese (if added) has melted.
  11. Carefully remove the panini from the press and transfer it to a cutting board.
  12. Let it cool slightly before slicing it in half.
  13. Optional: Garnish with fresh basil leaves for added freshness.

Tips and Tricks:

Tips and Tricks Grilled Vegetable Panini
  • Experiment with different vegetables like mushrooms, asparagus, or cherry tomatoes to add variety to your panini.
  • Add a spread like pesto, hummus, or sun-dried tomato paste to enhance the flavors.
  • Feel free to customize your panini by adding a slice of cheese (such as mozzarella or goat cheese) or a handful of arugula for added texture.
  • If you don’t have a panini press, you can use a stovetop skillet and place a heavy pan on top to press the sandwich.

Customization Ideas for Grilled Vegetable Panini:

Grilled Vegetable Panini
  • For a Mediterranean twist, add sliced black olives, feta cheese, and a drizzle of balsamic glaze.
  • Create a vegan version by omitting the cheese and using vegan bread and spreads.
  • Spice it up with a sprinkle of red pepper flakes or a dash of hot sauce for a kick of heat.
  • Serve your Grilled Vegetable Panini with a side salad or a cup of soup for a complete meal.

Indulge in the flavors of this Grilled Vegetable Panini, a satisfying and nutritious option for any mealtime. With its grilled vegetables, crispy bread, and customizable ingredients, this delightful sandwich is sure to become a favorite in your kitchen. Get creative, experiment with flavors, and enjoy the wholesome goodness of this delicious panini. Bon appétit!

Chocolate-Filled Doughnuts: Tempting Treats for Every Sweet Tooth

Welcome to our blog, where we dive into the delightful world of Chocolate-Filled Doughnuts! If you have a sweet tooth and an unwavering love for chocolate, you’re in for a treat. These delectable creations combine the heavenly taste of chocolate with the comforting and indulgent nature of doughnuts, resulting in an irresistible combination that will leave you craving for more.

Whether you’re a home baker looking to perfect your doughnut-making skills or a chocolate enthusiast seeking the ultimate chocolate-filled experience, this blog is tailored just for you. We’ll share helpful tips, step-by-step recipes, and creative ideas to take your love for chocolate-filled doughnuts to new heights.

Get ready to satisfy your cravings, discover new flavor combinations, and find inspiration to create your own tempting treats. Chocolate-Filled Doughnuts are here to captivate your taste buds and bring a little bit of sweetness into your life.

Indulge yourself in the world of Chocolate-Filled Doughnuts – the perfect temptation for every sweet tooth. Let’s dive in and explore the magic together!

Chocolate-Filled Doughnuts
These chocolate-filled doughnuts are worth every irresistible bite. ?

Ingredients :

  • 2 ¾ cups all-purpose flour
  • ¼ cup granulated sugar
  • 2 ¼ teaspoons instant yeast
  • ½ teaspoon salt
  • ½ cup warm milk
  • 2 tablespoons unsalted butter, melted
  • 2 large eggs
  • Vegetable oil, for frying
  • ½ cup chocolate-hazelnut spread or your favorite chocolate ganache (for filling)
  • Powdered sugar, for dusting

Equipment :

  • Fryer (with temperature control)
  • Mixing bowls
  • Whisk or electric mixer
  • Measuring cups and spoons
  • Rolling pin
  • Biscuit cutter or doughnut cutter
  • Piping bag or plastic sandwich bag (for filling)
  • Slotted spoon or spider strainer
  • Cooling rack

Instructions :

  1. Activate the yeast:
    • In a small bowl, combine warm milk and a pinch of sugar.
    • Sprinkle the instant yeast over the milk and let it sit for about 5 minutes until foamy.
  2. Prepare the dough:
    • In a large mixing bowl, whisk together flour, sugar, and salt.
    • Add the activated yeast mixture, melted butter, and eggs to the dry ingredients.
    • Mix everything until a sticky dough forms.
    • Transfer the dough to a lightly floured surface and knead for about 5 minutes until smooth and elastic.
  3. First rise:
    • Place the dough in a greased bowl, cover it with a clean kitchen towel, and let it rise in a warm place for about 1 hour or until doubled in size.
  4. Shape the doughnuts:
    • Once the dough has risen, gently punch it down and roll it out to a thickness of about ½ inch.
    • Use a biscuit cutter or doughnut cutter to cut out doughnut shapes.
    • Place the doughnuts on a lightly floured baking sheet, cover them, and let them rise for another 30 minutes.
  5. Heat the fryer and fry the doughnuts:
    • Fill the fryer with vegetable oil and preheat it to 350°F (175°C).
    • Carefully place a few doughnuts into the hot oil, frying them for about 2-3 minutes per side until golden brown.
    • Use a slotted spoon or spider strainer to transfer the fried doughnuts onto a paper towel-lined plate to remove excess oil.
  6. Fill the doughnuts:
    • Allow the doughnuts to cool slightly.
    • Fill a piping bag or plastic sandwich bag with the chocolate-hazelnut spread or chocolate ganache.
    • Insert the tip of the bag into each doughnut and pipe a generous amount of chocolate filling inside.

Customization Ideas :

goughnut
  • Drizzle melted white or dark chocolate over the filled doughnuts for an elegant touch.
  • Sprinkle chopped nuts, colorful sprinkles, or shredded coconut on top of the chocolate filling for added texture and visual appeal.
  • Dust the doughnuts with cocoa powder or cinnamon-sugar for an extra flavor boost.

Serving Ideas for Chocolate-Filled Doughnuts :

Serving Ideas for Chocolate-Filled Doughnuts :
  • Serve the Chocolate-Filled Doughnuts warm as a delicious breakfast treat or indulgent dessert.
  • Pair them with a cup of hot coffee or a cold glass of milk for a delightful combination.
  • Share them at brunch gatherings, birthday parties, or special occasions to impress your guests with homemade goodness.

With this recipe, you can bring the joy of freshly fried, chocolate-filled doughnuts to your kitchen. Embrace the customization options to make each batch unique and enjoy these delectable treats. Happy frying and savoring the irresistible goodness!

Irresistible Herb-Infused Ground Chicken Lettuce Wraps for a Light and Tasty Meal

In today’s post, we’re excited to share a mouthwatering recipe for “Irresistible Herb-Infused Ground Chicken Lettuce Wraps.” If you’re looking for a light and tasty meal that’s bursting with flavors, these lettuce wraps are the perfect choice.

One of the highlights of this recipe is the use of lettuce leaves as a crisp and refreshing alternative to traditional wraps or buns. The lettuce leaves provide a light and crunchy texture that perfectly complements the savory filling.

Whether you’re planning a casual lunch, a family dinner, or even entertaining guests, these herb-infused ground chicken lettuce wraps will impress everyone. The vibrant flavors and lightness of the dish make it a crowd-pleaser that will leave your taste buds craving for more.

So, join us on this culinary adventure as we explore the art of creating these delectable herb-infused ground chicken lettuce wraps. Get ready to enjoy a light, tasty, and satisfying meal that will have you coming back for seconds. Let’s dive in and discover the secrets to making these irresistible wraps that are sure to become a new favorite in your recipe repertoire.

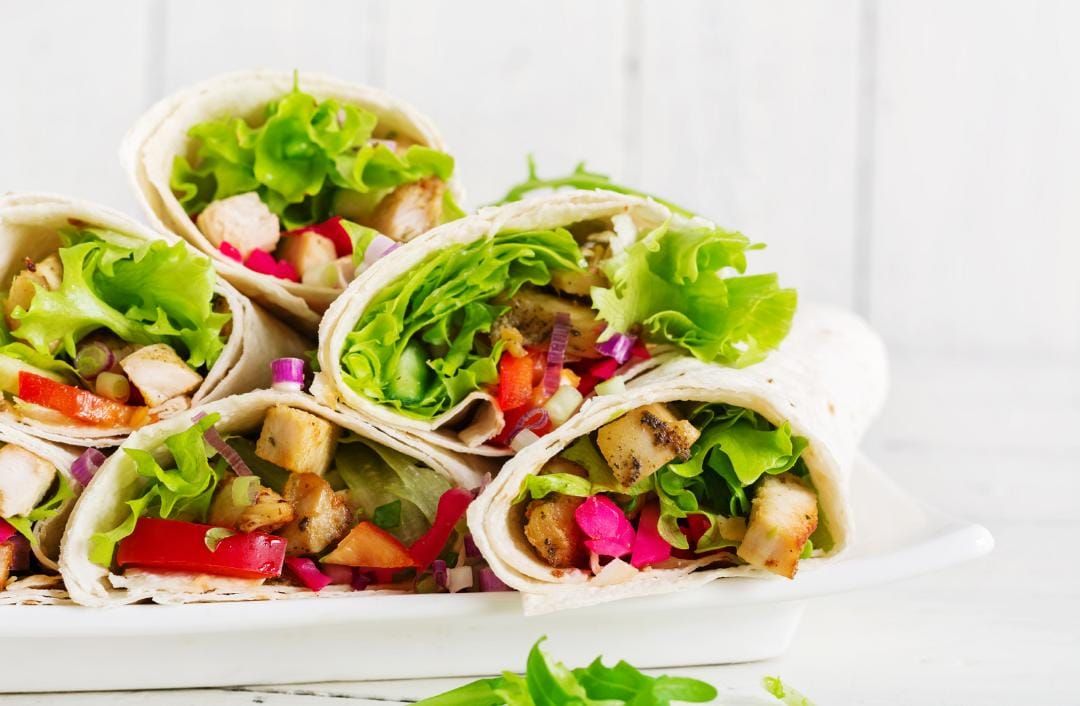
Chicken Lettuce Wraps
Fresh and Flavorful: Chicken Lettuce Wraps for the Win!

Ingredients :

For the Herb-Infused Ground Chicken:

  • 1 pound (450g) ground chicken
  • 2 cloves of garlic, minced
  • 1 tablespoon fresh basil, finely chopped
  • 1 tablespoon fresh cilantro, finely chopped
  • 1 tablespoon fresh mint, finely chopped
  • 1 teaspoon grated ginger
  • 1 teaspoon soy sauce
  • 1/2 teaspoon sesame oil
  • Salt and pepper to taste

For the Lettuce Wraps :

  • Fresh lettuce leaves (such as iceberg or butter lettuce)
  • 1 carrot, julienned
  • 1/2 cucumber, thinly sliced
  • 1/4 red onion, thinly sliced
  • Fresh lime wedges (for serving)

Equipment :

Instructions :

1. Prepare the Herb-Infused Ground Chicken :

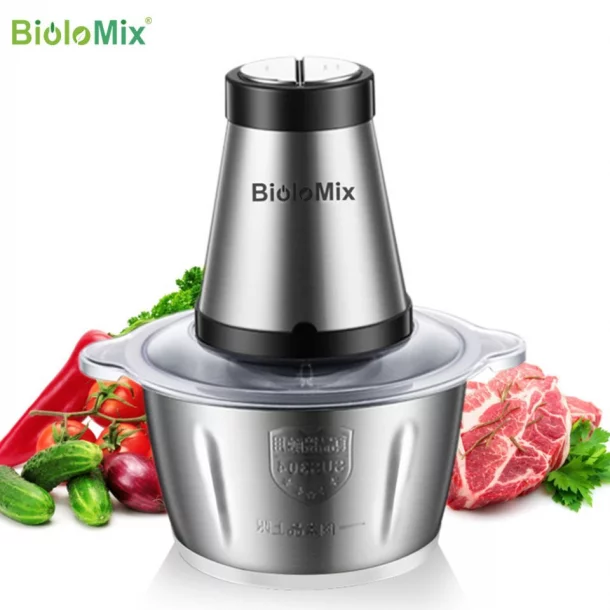
  • In the Biolomix grinder, grind the fresh basil, cilantro, and mint leaves until finely chopped.
  • In a mixing bowl, combine the ground chicken, minced garlic, grated ginger, soy sauce, sesame oil, and the chopped herbs.
  • Season with salt and pepper to taste.
  • Mix the ingredients thoroughly until well combined.

2. Shape and Cook the Chicken Filling :

  • Heat a non-stick skillet or frying pan over medium heat.
  • Divide the herb-infused ground chicken mixture into small portions and shape them into patties or small balls.
  • Place the chicken patties or balls in the heated skillet and cook for about 4-5 minutes per side, or until cooked through and browned.
  • Ensure the internal temperature of the chicken reaches 165°F (75°C).
  • Once cooked, remove the chicken from the skillet and set aside.

3. Assemble the Lettuce Wraps :

  • Take a fresh lettuce leaf and place a cooked chicken patty or ball in the center.
  • Top with julienned carrots, cucumber slices, and red onion.
  • Squeeze fresh lime juice over the filling for added zest.
  • Repeat the process with the remaining lettuce leaves and chicken patties/balls.

Serving Ideas :

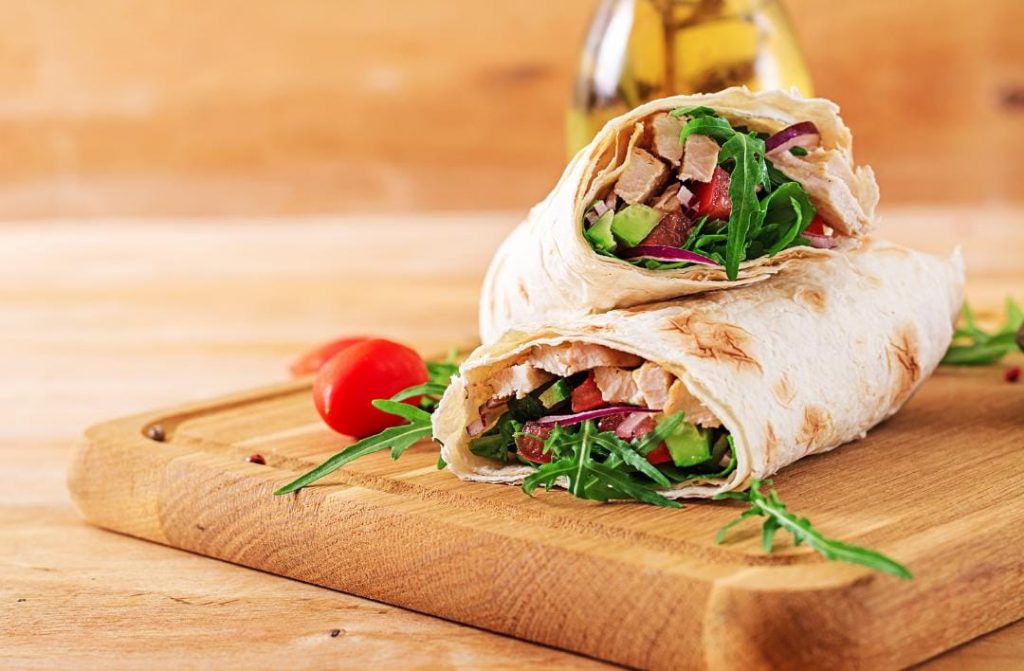
lettuce wraps
  1. Serve the herb-infused ground chicken lettuce wraps as a light lunch or dinner option.
  2. Drizzle with your favorite sauce, such as sweet chili sauce or peanut sauce, for an extra burst of flavor along with the chicken lettuce wraps.
  3. Garnish with additional chopped herbs or crushed peanuts for added texture and presentation.
  4. Pair with steamed rice or quinoa for a more substantial meal.

Benefits Of Chicken Lettuce Wraps :

Benefits Of Chicken Lettuce Wraps :
  1. Low in Carbs: Lettuce wraps provide a low-carb alternative to traditional wraps or bread, making them suitable for those watching their carbohydrate intake.
  2. Nutritious: Ground chicken is a lean protein source that’s lower in fat compared to other meats, and the fresh herbs add essential vitamins and antioxidants to the dish.
  3. Gluten-Free: These lettuce wraps are naturally gluten-free, making them suitable for individuals with gluten sensitivities or those following a gluten-free diet.
  4. Versatile: You can customize the filling by adding your favorite vegetables, sauces, or even experimenting with different herb combinations to suit your taste.

Enjoy the vibrant flavors and refreshing crunch of these herb-infused ground chicken lettuce wraps. This light and tasty meal is perfect for any occasion and offers a healthy twist to your dining experience. Embrace the benefits of this delightful recipe and savor each bite. Bon appétit!

Sous Vide Shrimp Tacos: The Perfectly Cooked, Flavorful, and Healthy Delight

If you’re looking for a delicious and healthy twist on traditional shrimp tacos, look no further than sous vide cooking. This method ensures that the shrimp is cooked perfectly every time, with a tender and juicy texture that is hard to achieve with other cooking methods.

In this blog, we’ll be sharing a recipe for Sous Vide Shrimp Tacos that is packed with flavor and nutrition. We’ll walk you through all the steps, from preparing the shrimp with a delicious blend of spices to assembling the tacos with fresh toppings and warm tortillas.

Not only is this recipe delicious, but it’s also a healthier alternative to traditional fried or grilled shrimp tacos. By cooking the shrimp in a sealed bag in a water bath, it retains all its natural juices and flavors without the need for additional fats or oils. This means you can enjoy a flavorful and satisfying meal without any guilt.

Whether you’re cooking for a family dinner, a dinner party, or just want to treat yourself to a delicious meal, Sous Vide Shrimp Tacos are sure to become a new favorite. So grab your sous vide machine, some fresh ingredients, and let’s get cooking!

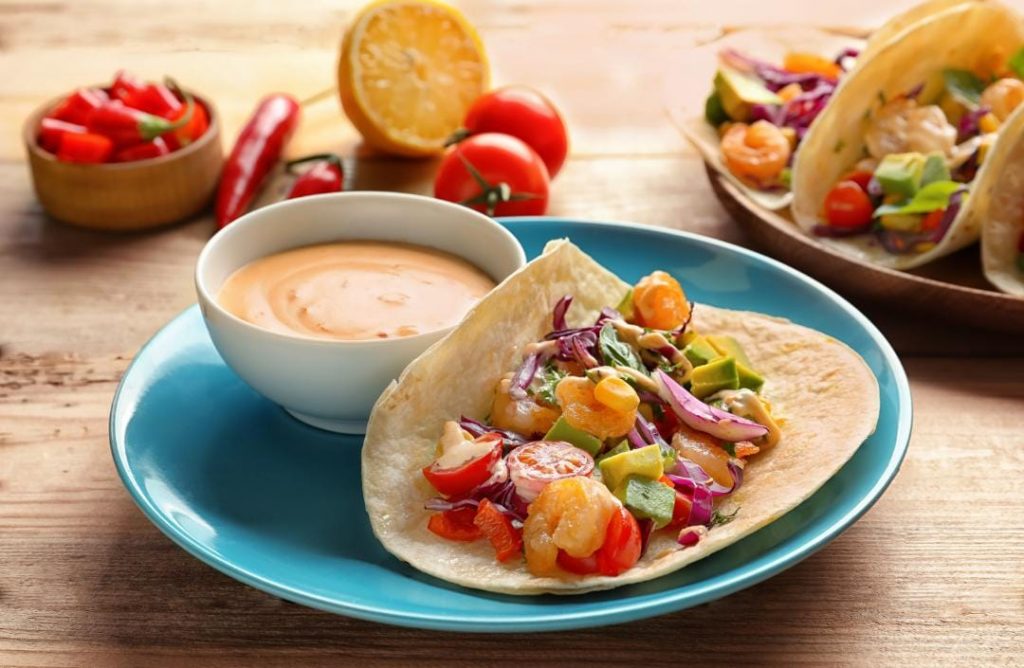
shrimp tacos
Treat Your Taste Buds to the Perfectly Cooked Shrimp Tacos!

Ingredients :

  • 1 pound large shrimp, peeled and deveined
  • 1 tablespoon olive oil
  • 1 tablespoon chili powder
  • 1 teaspoon smoked paprika
  • 1 teaspoon garlic powder
  • Salt and pepper, to taste
  • 8-10 small corn tortillas
  • 1 cup shredded cabbage
  • 1/4 cup chopped fresh cilantro
  • 1/4 cup crumbled queso fresco
  • Lime wedges, for serving

Equipment :

Instructions :

  1. Preheat the sous vide water bath to 135°F (57°C).
  2. In a bowl, mix together the olive oil, chili powder, smoked paprika, garlic powder, salt, and pepper. Add the shrimp and toss to coat.
  3. Place the seasoned shrimp in a single layer in a ziplock bag, and seal the bag using the water displacement method.
  4. Once the water bath has reached the desired temperature, carefully lower the bag into the water bath using tongs. Make sure the bag is fully submerged and leave it to cook for 30-45 minutes.
  5. While the shrimp is cooking, prepare the tortillas by warming them up in a grill or cast-iron skillet.
  6. Once the shrimp is done, remove the bag from the water bath and remove the shrimp from the bag. Discard the cooking liquid.
  7. To assemble the tacos, place some shredded cabbage on each tortilla, followed by 2-3 shrimp, a sprinkle of chopped cilantro, and a few crumbles of queso fresco. Squeeze a lime wedge over the top of each taco.
  8. Serve immediately and enjoy!

Customization :

 for Shrimp Tacos :
  • You can customize the spice level of the shrimp by adding more or less chili powder.
  • Add sliced avocado or guacamole to the tacos for some creaminess.
  • Use flour tortillas instead of corn tortillas if you prefer.
  • Add hot sauce or salsa to the tacos for some extra heat.

Serving Ideas for Shrimp Tacos :

Serving Ideas for Shrimp Tacos :
  • Serve the shrimp tacos with a side of Mexican-style rice and beans.
  • Make a taco bar and let everyone assemble their own tacos with different toppings.
  • Serve with a cold beer or a margarita for a refreshing and delicious meal.

Sous Vide Shrimp Tacos are a delicious and healthy way to enjoy this classic dish. By using the precise cooking method of sous vide, you can ensure that your shrimp is cooked to perfection every time, with a juicy and tender texture that is hard to achieve with other cooking methods.

Biolomix sous vide cooking is an excellent way to elevate your culinary skills and create perfectly cooked meals that are bursting with flavor. So why not give this Sous Vide Shrimp Tacos recipe a try and see for yourself how delicious and easy it is to create this healthy and flavorful delight?

Creamy Carrot Soup: The Perfect Easter Recipe for a Healthy Feast

Easter is a time of celebration, and what better way to celebrate than with a delicious, nutritious meal? One dish that is sure to impress is a warm, comforting bowl of creamy carrot soup. This soup is not only delicious but also incredibly healthy, making it the perfect addition to your Easter feast.

Carrots are packed with vitamins and minerals, including vitamin A, which is essential for maintaining healthy vision and skin. Additionally, carrots are high in fiber, which can aid in digestion and promote overall gut health. When combined with other wholesome ingredients such as onion, garlic, and broth, creamy carrot soup becomes a flavorful and satisfying meal that is perfect for any occasion.

This blog post will provide you with a step-by-step guide to making creamy carrot soup, along with tips for customizing the recipe to suit your tastes. We’ll also explore the health benefits of this soup and share why it is an excellent choice for an Easter feast.

So, let’s get cooking and make this Easter meal a healthy and delicious one!

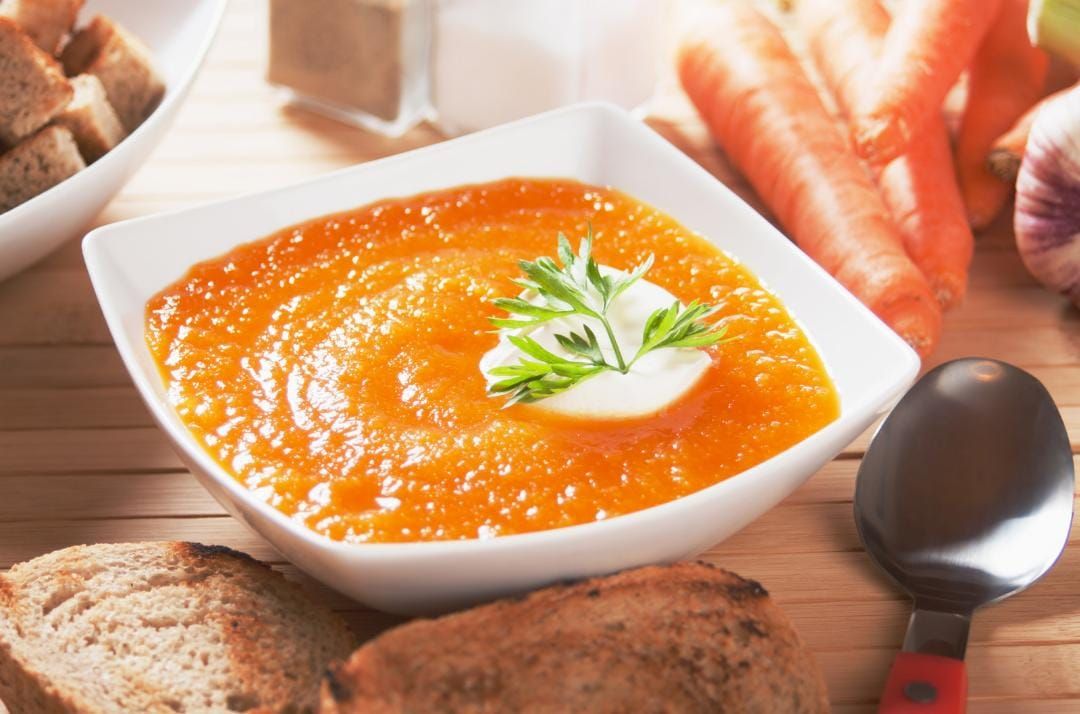
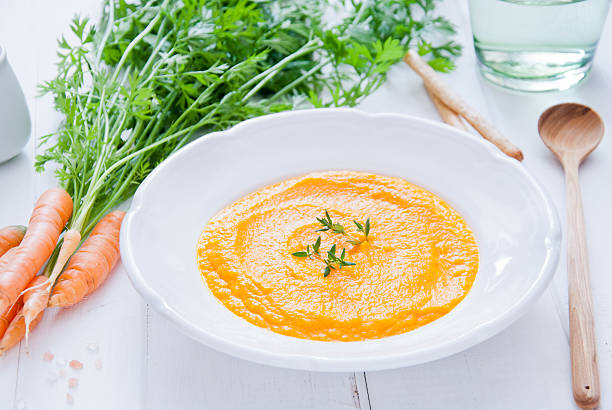
creamy carrot soup
Add a touch of elegance to your Easter table with this creamy and flavorful carrot soup. ????

Ingredients :

  • 2 pounds of carrots, peeled and chopped
  • 1 large onion, diced
  • 3 garlic cloves, minced
  • 4 cups of vegetable broth
  • 1 cup of heavy cream
  • 2 tablespoons of olive oil
  • Salt and pepper to taste
  • Chopped fresh parsley for garnish

Equipment :

Instructions :

  1. Heat the olive oil in a large soup pot over medium heat. Add the diced onion and minced garlic and cook for 2-3 minutes, or until the onion is translucent.
  2. Add the chopped carrots and vegetable broth to the pot. Bring the mixture to a boil, then reduce the heat and simmer for 20-25 minutes, or until the carrots are tender.
  3. Remove the pot from the heat and allow the mixture to cool slightly. Use an immersion blender or transfer the soup to a blender and blend until smooth.
  4. Return the soup to the pot and stir in the heavy cream. Heat the soup over low heat until warmed through.
  5. Season the soup with salt and pepper to taste. Garnish with chopped parsley before serving.

Health Benefits :

Creamy carrot soup is a healthy and nutritious dish that provides many benefits for your body –

  1. Boosts immunity: Carrots are packed with antioxidants and essential vitamins, including vitamin C and vitamin A, which help to boost your immune system and keep your body healthy.
  2. Promotes healthy digestion: Carrots are high in fiber, which aids in digestion and promotes healthy bowel movements. A bowl of creamy carrot soup can help keep your digestive system functioning correctly.
  3. Good for eyesight: Carrots are a rich source of vitamin A, which is essential for maintaining healthy vision. Eating creamy carrot soup can help improve your eyesight and protect against age-related vision problems.
  4. Reduces inflammation: The beta-carotene in carrots has anti-inflammatory properties that can help reduce inflammation in your body. This can help relieve symptoms of conditions such as arthritis and asthma.
  5. Lowers cholesterol: The soluble fiber in carrots helps lower cholesterol levels, which can reduce your risk of heart disease and stroke.
  6. Promotes healthy skin: Vitamin A and antioxidants found in carrots can help promote healthy skin by reducing the damage caused by free radicals and improving skin elasticity.
carrot soup

Customization Tips for Creamy carrot soup :

  • Add some heat: If you prefer a spicier soup, try adding a pinch of cayenne pepper or red pepper flakes.
  • Experiment with herbs: Instead of parsley, try garnishing your soup with chopped chives, thyme, or rosemary.
  • Add some crunch: Top your soup with croutons, toasted almonds, or pumpkin seeds for added texture.
  • Make it vegan: Swap the heavy cream for a non-dairy alternative like coconut cream or cashew cream.

Creamy carrot soup is a delicious and nutritious addition to any Easter meal. With its comforting flavor and health benefits, it is sure to be a hit with your family and friends. Whether you follow our recipe or customize it to your liking, we hope you enjoy this tasty soup and have a happy and healthy Easter!

Sous Vide Butternut Squash and Apple Soup: A Tender Delight

Welcome to our blog post on Sous Vide Butternut Squash and Apple Soup! As the weather turns cooler, there’s nothing quite like a warm bowl of soup to comfort and nourish the body. This recipe is the perfect combination of sweet and savory, and the use of sous vide cooking ensures that the butternut squash and apples are cooked to perfection.

By sealing the ingredients in an airtight bag and cooking them in a precisely controlled water bath, you can achieve a tender and delicious result that will elevate your soup game to the next level.

The addition of warming spices and cream makes this soup a cozy and comforting meal that is perfect for a chilly evening. From the ingredients and equipment needed, to the step-by-step instructions and tips for success, we’ll show you how to make this delicious and comforting soup in no time. So, without further ado, let’s dive into the recipe and learn how to make this delightful dish!

butternut squash
Nothing beats a homemade soup, especially one as flavorful and delicious as this butternut squash and apple soup. ????

Here’s what you’ll need to get started :

Ingredients :

  • 1 medium-sized butternut squash, peeled and cut into cubes
  • 2 medium-sized apples, peeled and chopped
  • 1 medium-sized onion, chopped
  • 2 garlic cloves, minced
  • 1 teaspoon ground cinnamon
  • 1/2 teaspoon ground nutmeg
  • 1/2 teaspoon ground ginger
  • 1/2 teaspoon dried thyme
  • 1 tablespoon olive oil
  • 3 cups vegetable or chicken stock
  • 1/2 cup heavy cream
  • Salt and pepper to taste
  • Fresh thyme or parsley for garnish (optional)
Power Blender With Timer – 3HP

Equipment :

Instructions To Make Butternut Squash and Apple Soup :

  1. Preheat the Biolomix Sous Vide to 180°F (82°C).
  2. In a large bowl, toss together the butternut squash, apples, onion, garlic, cinnamon, nutmeg, ginger, salt, pepper, and olive oil.
  3. Place the mixture in a vacuum sealer bag or zip-top bag and remove the air using a vacuum sealer or the water displacement method.
  4. Submerge the bag in the preheated water bath and cook for 2 hours.
  5. Once the cooking time is up, carefully remove the bag from the water bath and transfer the contents to a large bowl.
  6. Using an immersion blender or blender, puree the mixture until smooth.
  7. If the soup is too thick, add vegetable broth, a little at a time, until it reaches your desired consistency.
  8. Taste and adjust the seasoning, adding more salt or pepper as needed.
  9. Serve the soup hot with crusty bread or crackers.

Tips :

  • When vacuum sealing the bag, make sure to leave some room for the air to circulate, so the ingredients cook evenly.
  • For a creamier soup, add a splash of heavy cream or coconut milk before blending.
  • If you don’t have a vacuum sealer, you can use a zip-top bag and the water displacement method to remove the air.
  • Leftover soup can be stored in the refrigerator for up to 4 days or frozen for up to 3 months.

The Sous Vide Butternut Squash and Apple Soup recipe is a delicious and nutritious way to enjoy two beloved fall ingredients. The use of the Sous Vide method ensures that the butternut squash and apples are perfectly cooked, with a tender and flavorful texture that can’t be achieved with traditional cooking methods. The addition of warming spices such as cinnamon and nutmeg, along with the savory notes of garlic and onion, make this soup a comforting and satisfying meal.

It is a must-try recipe for anyone looking for a comforting and healthy meal. The combination of tender squash and sweet apples, infused with warming spices and savory aromatics, makes for a soup that is both satisfying and delicious. By using the Biolomix Sous Vide, home cooks can achieve restaurant-quality results with ease and confidence, making this recipe a staple in any fall and winter meal rotation.