
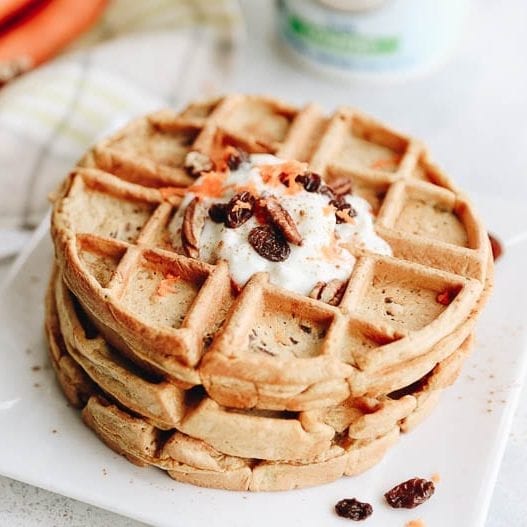
Lemon Poppyseed Waffles: Fluffy, Zesty, and Perfect for Easter

Easter is a time of renewal, of fresh beginnings, and of course, of delicious food. If you’re looking for a mouth-watering recipe that’s perfect for the occasion, look no further than lemon poppyseed waffles. These waffles are the epitome of springtime: light, fluffy, and bursting with zesty flavor.

There’s just something about the combination of lemon and poppyseeds that screams “Easter.” Maybe it’s the bright, sunny taste of lemon, or maybe it’s the delicate crunch of poppyseeds that reminds us of the newly-sprouted flowers outside. Whatever the reason, lemon poppyseed waffles are the ultimate Easter breakfast or brunch dish.

From choosing the right ingredients to mastering the technique, we’ve got you covered. You’ll learn how to create waffles that are crispy on the outside, fluffy on the inside, and bursting with the tangy sweetness of lemon and the satisfying crunch of poppyseeds.

Whether you’re hosting a big family gathering or just want to treat yourself to something special, lemon poppyseed waffles are sure to impress. So, let’s get started and make this Easter one to remember with this delicious recipe.

Lemon Poppyseed Waffles
Add a pop of flavor to your Easter brunch with these delicious waffles! ????

Ingredients :

  • 2 cups all-purpose flour
  • 2 tablespoons granulated sugar
  • 2 teaspoons baking powder
  • 1/2 teaspoon baking soda
  • 1/2 teaspoon salt
  • 2 tablespoons poppyseeds
  • 1 tablespoon finely grated lemon zest
  • 1 3/4 cups buttermilk
  • 2 large eggs
  • 1/3 cup vegetable oil
  • 1 teaspoon vanilla extract

Equipment :

  • Waffle maker
  • Mixing bowls
  • Whisk
  • Measuring cups and spoons
  • Grater
  • Spatula

Instructions :

  1. Preheat your waffle maker according to the manufacturer’s instructions.
  2. In a large mixing bowl, whisk together the flour, sugar, baking powder, baking soda, salt, poppyseeds, and lemon zest.
  3. In a separate mixing bowl, whisk together the buttermilk, eggs, vegetable oil, and vanilla extract.
  4. Add the wet ingredients to the dry ingredients and stir until just combined. Do not overmix – a few lumps are okay.
  5. Using a ladle or measuring cup, pour the batter onto the preheated waffle maker. Cook until the waffles are golden brown and crispy, about 3-4 minutes.
  6. Carefully remove the waffles from the waffle maker using a spatula and transfer to a serving plate.
  7. Serve the waffles warm, garnished with fresh lemon slices and a sprinkle of powdered sugar.

Serving Ideas for Lemon Poppyseed Waffles :

  • Top with fresh whipped cream and strawberries for a classic combination.
  • Drizzle with honey or maple syrup and sprinkle with chopped nuts for a sweet and crunchy finish.
  • Serve with a dollop of lemon curd or raspberry jam for an extra burst of flavor.
  • Add a scoop of vanilla ice cream and a sprinkle of lemon zest for a summery twist.
  • Layer with sliced bananas and Nutella for a decadent breakfast or dessert.
Serving Ideas for Lemon Poppyseed Waffles
Lemon Poppyseed Waffles with Blueberry Compote.

Customization Ideas :

  • Swap out the lemon zest for orange zest or lime zest for a different citrus flavor.
  • Add a teaspoon of cinnamon or nutmeg for a warm and spicy taste.
  • Fold in fresh blueberries or raspberries for a fruity twist.
  • Substitute the all-purpose flour with whole wheat flour or almond flour for a healthier option.
  • Make the waffles savory by omitting the sugar and poppy seeds, and adding shredded cheddar cheese and chopped ham to the batter. Serve with a fried egg on top for a delicious brunch option.

Lemon Poppyseed Waffles are a perfect addition to your Easter brunch menu. These fluffy and zesty waffles are bursting with fresh lemon flavor and poppy seeds add a delightful crunch. The recipe is simple and easy to customize to your taste preferences.

Whether you prefer sweet or savory, there are many serving and customization options available. With a variety of topping and flavor combinations, these waffles are sure to become a family favorite. So, gather your loved ones this Easter and treat them to a stack of Lemon Poppyseed Waffles. Happy brunching!

Homemade Hollandaise Sauce: The Key to a Decadent Breakfast Experience

Homemade Hollandaise Sauce is a rich and creamy sauce that has become a staple in breakfast menus all over the world. This sauce is most commonly used in the famous Eggs Benedict dish, but it can also be used to elevate many other breakfast dishes. While Hollandaise Sauce may seem daunting to make at home, with the right technique and ingredients, it can be easy and delicious to prepare.

In this blog post, we will take a deep dive into the world of Hollandaise Sauce, exploring the key ingredients and step-by-step instructions on how to make it at home. We will also provide some tips and tricks to ensure that your Hollandaise Sauce comes out perfectly every time.

Whether you are a seasoned cook or a beginner, this blog post is for you. By the end of it, you will have all the knowledge and confidence you need to make a perfect Hollandaise Sauce at home. So, get ready to impress your friends and family with a decadent breakfast experience that they will never forget!

 Homemade Hollandaise Sauce
Creamy, buttery, and simply irresistible – Homemade Hollandaise Sauce is the perfect addition to your breakfast menu!

Ingredients :

  • 3 egg yolks
  • 1 tablespoon lemon juice
  • 1/2 cup unsalted butter, melted
  • Salt and pepper to taste
  • Cayenne pepper (optional)

Equipment :

Instructions :

  1. In a blender, combine the egg yolks and lemon juice. Blend on medium speed until the mixture is smooth and slightly thickened.
  2. While the blender is running, slowly pour in the melted butter in a steady stream. The mixture should thicken and become smooth.
  3. Add salt, pepper, and cayenne pepper (if using) to taste. Blend for another 5-10 seconds until everything is fully incorporated.
  4. If the sauce is too thick, add a teaspoon of warm water and blend again until desired consistency is reached.
  5. Serve the Hollandaise Sauce immediately or keep it warm over a double boiler until ready to use.

Tips and Tricks :

  • Make sure the butter is hot but not boiling before adding it to the blender, or it could cook the yolks and ruin the sauce.
  • If the sauce is too thick, add warm water one teaspoon at a time until desired consistency is reached.
  • Do not over-blend the sauce or it may become too thin and runny.
  • If the sauce curdles or separates, blend in a tablespoon of warm water until it smooths out again.
Digital Food Blender 800-500 W

Where to use Hollandaise Sauce :

  • Eggs Benedict: The most classic use for Hollandaise Sauce, traditionally served over poached eggs and Canadian bacon on an English muffin.
  • Asparagus: Serve steamed or roasted asparagus with a generous drizzle of Hollandaise Sauce.
  • Fish: Hollandaise Sauce pairs well with any white fish, such as halibut, cod, or sole.
  • Vegetables: Use Hollandaise Sauce to dress up boiled or steamed vegetables, like broccoli, carrots, or green beans.
  • Chicken: Try a chicken and Hollandaise Sauce dish by serving grilled or roasted chicken breasts with a side of vegetables and a dollop of sauce.

Homemade Hollandaise sauce is a delicious and decadent addition to any breakfast or brunch dish. Whether you’re serving it over poached eggs, asparagus, or fish, this creamy sauce adds richness and depth of flavor that is sure to impress your guests or loved ones. With a few simple ingredients and some basic cooking techniques, you can make this sauce from scratch in just a few minutes, and it’s far more flavorful than store-bought versions.

While Hollandaise sauce may seem intimidating to make, with a little practice and some helpful tips and tricks, you can master this classic sauce in no time. Whether you use a blender or a double boiler, the key is to whisk constantly and keep the heat low and steady to avoid curdling or separating. And don’t be afraid to experiment with different flavorings and spices to make it your own.

Healthy Easter Treat: Carrot Apple Juice Recipe

Spring is in the air, and Easter is just around the corner! This festive holiday is a time to celebrate new beginnings, family traditions, and, of course, delicious food. If you’re looking for a healthy and refreshing treat to enjoy during your Easter celebrations, look no further than carrot apple juice.

This simple yet delicious juice is packed with vitamins, minerals, and antioxidants that offer a range of health benefits. Carrots are rich in vitamin A, which is essential for healthy eyesight, skin, and immune system. Apples are rich in antioxidants and fiber, which can help improve digestion and reduce the risk of heart disease.

This carrot apple juice recipe is not only healthy but also easy to make. All you need are a few simple ingredients and a juicer or blender. You can even customize the recipe to suit your taste preferences by adding honey, cinnamon, or other fruits and vegetables.

In this blog post, we’ll provide you with a step-by-step guide on how to make this delicious carrot apple juice. We’ll also explore the health benefits of this nutritious beverage and provide some customization and serving ideas. So, let’s dive in and discover the perfect healthy Easter treat with our carrot apple juice recipe!

carrot apple juice
Raise a glass to good health with our refreshing carrot apple juice this Easter! ????????

Ingredients :

  • 4 medium-sized carrots, peeled and chopped
  • 2 medium-sized apples, cored and chopped
  • 1 inch piece of ginger, peeled and chopped (optional)
  • 1 tablespoon lemon juice
  • 1 cup water
  • Ice cubes (optional)

Equipment :

  • Juicer or a blender
  • Fine mesh strainer or nut milk bag
  • Large bowl
  • Glass pitcher or bottle
  • Serving glasses

Instructions :

  1. Wash and chop the carrots, apples, and ginger into small pieces.
  2. Add the chopped ingredients to your juicer or blender.
  3. Add 1 cup of water and blend until smooth.
  4. Strain the mixture through a fine mesh strainer or nut milk bag into a large bowl.
  5. Discard the pulp and pour the juice into a glass pitcher or bottle.
  6. Add 1 tablespoon of lemon juice to the juice and stir well.
  7. Chill in the refrigerator for 30 minutes.
  8. Serve chilled over ice cubes in glasses.

Health Benefits of Carrot Apple Juice :

  1. Boosts Immunity: The vitamin C and antioxidants in carrot apple juice can help boost the immune system, preventing illnesses and infections.
  2. Promotes Digestion: The fiber content in apples and ginger can aid digestion, promoting gut health and regular bowel movements.
  3. Lowers Cholesterol: The soluble fiber in apples can help lower LDL (bad) cholesterol levels in the body, reducing the risk of heart disease.
  4. Improves Vision: Carrots are rich in vitamin A, which is essential for healthy eyesight and can help improve vision.
  5. Detoxifies the Body: Carrots are known to have detoxifying properties, which can help flush out toxins from the body, improving liver and kidney function.
  6. Promotes Healthy Skin: The vitamin A and antioxidants in carrot apple juice can help improve skin health, preventing acne and promoting a healthy glow.
Health Benefits of Carrot Apple Juice :

Customization Ideas :

  • For a sweeter juice, add a tablespoon of honey or maple syrup.
  • Add a pinch of cinnamon or nutmeg for a warm and spicy flavor.
  • Substitute the apples for pears or pineapples for a different flavor profile.
  • Add a handful of spinach or kale for an extra dose of greens.

Serving Ideas :

  • Serve carrot apple juice as a refreshing drink for breakfast or brunch.
  • Pair it with a salad or sandwich for a healthy lunch.
  • Serve it as a non-alcoholic beverage at a party or gathering.
  • Freeze the juice in ice cube trays and use them to make smoothies or cocktails.

Enjoy your delicious and healthy carrot apple juice!

Carrot Cake Waffles: The Perfect Easter Brunch

Easter is just around the corner, and it’s the perfect time to gather with family and friends to enjoy a delicious brunch. While there are many classic brunch options, there’s one recipe that’s sure to stand out and add a touch of sweetness to your Easter morning – carrot cake waffles!

Combining the classic flavors of a carrot cake with the convenience and fun of waffles, these carrot cake waffles are the perfect addition to any Easter brunch menu. They’re easy to make, customizable, and absolutely delicious. Not to mention, they’re a great way to use up any leftover carrots you may have in your fridge.

In this blog post, we’ll walk you through the step-by-step process of making carrot cake waffles, including tips for customizing the recipe to your liking. Plus, we’ll share some ideas for serving them, including toppings and accompaniments that will make your Easter brunch extra special.

So, whether you’re a seasoned chef or just starting out, get ready to impress your guests with this unique and mouthwatering recipe. Let’s dive in and learn how to make the perfect carrot cake waffles for Easter brunch!

Carrot Cake Waffles: The Perfect Easter Brunch
Sweet, spicy, and oh-so-delicious – these carrot cake waffles are a must-try for any brunch lover! ????????

Ingredients :

  • 2 cups all-purpose flour
  • 1/4 cup granulated sugar
  • 1/4 cup brown sugar
  • 2 teaspoons baking powder
  • 1/2 teaspoon baking soda
  • 1/2 teaspoon salt
  • 2 teaspoons ground cinnamon
  • 1/4 teaspoon ground ginger
  • 1/4 teaspoon ground nutmeg
  • 1/4 teaspoon ground cloves
  • 1/2 cup grated carrots
  • 2 eggs
  • 1/2 cup unsweetened applesauce
  • 1/2 cup milk
  • 1/3 cup vegetable oil
  • 1 teaspoon vanilla extract

Equipment :

  • Waffle maker
  • Mixing bowl
  • Whisk
  • Grater
  • Measuring cups and spoons

Instructions :

  1. Preheat your waffle maker according to its instructions.
  2. In a mixing bowl, whisk together the flour, granulated sugar, brown sugar, baking powder, baking soda, salt, cinnamon, ginger, nutmeg, and cloves until combined.
  3. Stir in the grated carrots.
  4. In another bowl, whisk together the eggs, applesauce, milk, vegetable oil, and vanilla extract.
  5. Pour the wet ingredients into the dry ingredients and whisk until just combined. Be careful not to overmix, as this can result in tough waffles.
  6. Pour the batter onto the preheated waffle maker, using the recommended amount for your waffle maker. Cook until the waffles are golden brown and crispy on the outside.
  7. Serve the waffles hot, topped with your favorite toppings such as whipped cream, cream cheese frosting, maple syrup, nuts, or fresh fruit.

Tips for Customizing Carrot Cake Waffles :

  • Add 1/2 cup of chopped pecans or walnuts to the batter for a crunchy texture.
  • Replace the grated carrots with grated sweet potato or zucchini for a twist on the classic recipe.
  • Swap out the applesauce for mashed banana or pineapple for a different flavor.
  • Use coconut oil instead of vegetable oil for a subtle coconut flavor.
  • For a gluten-free option, replace the all-purpose flour with a gluten-free flour blend.
Tips for Customizing Carrot Cake Waffles :
Carrot cake waffles with cream cheese topping!

Ideas for Serving :

  • Top with whipped cream cheese frosting and chopped walnuts for a dessert-like treat.
  • Serve with maple syrup and bacon for a savory and sweet combination.
  • Add a dollop of Greek yogurt and fresh berries for a lighter option.
  • Drizzle with honey and sprinkle with cinnamon for a simple yet delicious breakfast.
  • Make a waffle sandwich with a fried egg and ham for a hearty brunch option.

Carrot cake waffles are a fun and delicious twist on a classic breakfast dish that are perfect for Easter brunch or any occasion. With their fluffy texture and warm spices, they are sure to satisfy your sweet tooth while also sneaking in some veggies. Plus, this recipe is customizable, allowing you to experiment with different ingredients to find your perfect combination.

To serve, top your waffles with your favorite toppings or get creative with a waffle sandwich. With their versatility and irresistible flavor, carrot cake waffles are a delightful addition to any brunch menu.

We hope this recipe has inspired you to try something new and delicious this Easter season. Happy brunching!

Egg-citing Easter Fruit Smoothie for a Healthy Holiday

As Easter approaches, it’s time to start thinking about delicious and healthy treats to share with family and friends. While traditional Easter sweets can be tempting, there are plenty of healthy and refreshing options to indulge in during this holiday. And what better way to celebrate than with a colorful and nutritious Easter fruit smoothie?

Not only are fruit smoothies delicious and refreshing, but they’re also an excellent way to pack in essential vitamins and minerals. By using a variety of fruits and vegetables, you can create a smoothie that not only tastes great but also provides numerous health benefits.

In this blog post, we’ll explore an egg-citing Easter fruit smoothie recipe that will help you celebrate the holiday in a healthy way. This recipe is easy to make and perfect for serving as a nutritious breakfast, a snack, or a post-Easter egg hunt treat.

This Easter fruit smoothie is sure to satisfy your cravings and leave you feeling energized and refreshed. Let’s get blending!

Easter fruit smoothie
Spring into Easter with a burst of fruity goodness in every sip! ????????

Ingredients :

  • 1 cup of frozen mixed berries (strawberries, raspberries, blueberries)
  • 1 banana
  • 1 cup of unsweetened vanilla almond milk
  • 1/2 cup of plain Greek yogurt
  • 1 tablespoon of honey
  • 1/2 teaspoon of vanilla extract
  • 1 cup of ice
  • Optional toppings: fresh berries, shredded coconut, chia seeds

Equipment :

  • Blender
  • Measuring cups and spoons
  • Knife and cutting board
  • Serving glasses

Instructions :

  1. Start by preparing your ingredients. Cut the banana into small chunks and set aside. If your mixed berries are not already frozen, place them in the freezer for at least an hour prior to making the smoothie.
  2. Add the frozen mixed berries, banana chunks, unsweetened vanilla almond milk, plain Greek yogurt, honey, and vanilla extract into the blender.
  3. Blend on high until the ingredients are smooth and well combined. If the mixture is too thick, add more almond milk until it reaches your desired consistency.
  4. Once the mixture is smooth, add the ice and blend again until the ice is completely incorporated.
  5. Pour the Easter fruit smoothie into serving glasses and add your desired toppings. We recommend fresh berries, shredded coconut, or chia seeds for added texture and flavor.
  6. Serve immediately and enjoy!

Health Benefits of Easter Fruit Smoothie :

This Easter Fruit Smoothie is not only delicious but also packed with essential nutrients that promote overall health and wellness. Here are a few of the health benefits you can expect from this smoothie :

  • Rich in antioxidants: The mixed berries in this smoothie are packed with antioxidants, which help protect your cells from damage caused by free radicals.
  • High in fiber: The banana in this smoothie is a great source of dietary fiber, which promotes healthy digestion and can help you feel full for longer periods of time.
  • Low in sugar: By using unsweetened almond milk and plain Greek yogurt, this smoothie is low in added sugars, making it a healthier option compared to other Easter treats.
  • Good source of protein: The Greek yogurt in this smoothie is a great source of protein, which is essential for building and repairing muscle tissue.

In conclusion, a healthy and refreshing Easter treat doesn’t have to be boring or bland. With the Easter Fruit Smoothie recipe, you can enjoy the holiday while still making healthy choices. By using a variety of fruits and vegetables, this smoothie is not only delicious but also packed with essential vitamins and minerals. It’s also a great way to satisfy your sweet tooth without consuming a lot of added sugars, which can lead to energy crashes and weight gain. So why not try this Egg-citing Easter Fruit Smoothie recipe this holiday season and give your body the nourishment it deserves while enjoying a tasty treat!

Sous Vide Corn on the Cob: The Perfect Side Dish for Any Occasion

Sous vide corn on the cob is a staple side dish for many meals, but getting it perfectly cooked can be a challenge. Overcooking can leave the kernels tough and chewy, while undercooking can leave them underwhelming and lackluster. That’s where sous vide cooking comes in – this technique allows for precise temperature control, ensuring that your corn on the cob is perfectly tender and bursting with flavor every time.

In this blog post, we will explore the wonderful world of sous vide corn on the cob. We will walk you through the steps of preparing and cooking this delicious dish, and share our favorite tips and tricks to ensure that your corn on the cob is a hit at any occasion.

Whether you’re hosting a summer barbecue, preparing a holiday feast, or simply looking for a tasty side dish for a weekday meal, sous vide corn on the cob is the perfect choice. So let’s get started and discover how to create the perfect corn on the cob with sous vide cooking!

sous vide corn on the cob
Tender, juicy, and bursting with flavor – sous vide corn on the cob is a game-changer! ????

Ingredients :

To make sous vide corn on the cob, you will need the following ingredients :

  • Fresh corn on the cob, with husks removed
  • Salt
  • Butter (optional)

Equipment :

To cook sous vide corn on the cob, you will need the following equipment :

Instructions :

  1. Preheat your sous vide machine to 185°F (85°C).
  2. Rinse the corn on the cob under cold running water to remove any dirt or debris.
  3. Season the corn with salt, and optionally, add a small knob of butter to the bag.
  4. Place the corn in a large ziplock bag or vacuum sealer bag, and remove as much air as possible using a vacuum sealer or the water displacement method.
  5. Once the water has reached the desired temperature, carefully lower the bagged corn into the water bath and ensure it is fully submerged.
  6. Cook the corn for 45-60 minutes, depending on the size of the corn.
  7. After the cooking time is up, remove the bag from the water bath and carefully take out the corn.
  8. Optionally, you can grill the corn for a few minutes to give it a nice charred flavor.

Tips to prepare Perfect Sous Vide Corn on The Cob:

  • Make sure the corn is fully submerged in the water bath to ensure even cooking.
  • If you’re using ziplock bags, make sure they are made from high-quality plastic and are properly sealed to avoid leaks.
  • Add extra seasonings such as chili powder, garlic powder, or herbs to the bag to give the corn a unique flavor.
  • Don’t forget to remove the silk from the corn before cooking it.

Biolomix Sous vide corn on the cob is a game-changer for anyone who loves this classic side dish. This cooking method ensures that the corn is cooked evenly and perfectly every time, without the risk of overcooking or undercooking. The result is a tender and flavorful corn on the cob that is perfect for any occasion.

In addition to being delicious, sous vide corn on the cob is also a healthy option as it retains all the nutrients and natural sweetness of the corn. This makes it a perfect addition to any meal, whether you’re serving it as a side dish or as a snack.

Overall, sous vide corn on the cob is a must-try recipe that will elevate your cooking game and impress your guests. With minimal effort and maximum flavor, it’s a dish that will become a staple in your kitchen. So grab your sous vide machine, some fresh corn on the cob, and give this recipe a try – you won’t be disappointed!

Sous Vide Brisket: Tips and Tricks for a Delicious Meal

Sous vide cooking has been gaining popularity in recent years due to its ability to produce tender, juicy and perfectly cooked meats. And if you are a meat lover, then you must have heard of the deliciousness that is Sous Vide Brisket. Brisket is a tough cut of meat that requires a long and slow cooking process to achieve tenderness and flavor.

Sous vide cooking provides a solution by allowing you to cook the brisket to the perfect temperature over a long period of time, resulting in a melt-in-your-mouth texture that will leave you craving for more.

However, cooking Sous Vide Brisket can be tricky, and it’s easy to make mistakes that could affect the quality of your meal. That’s why in this blog post, we’ll be sharing some tips and tricks that will help you achieve a delicious and perfectly cooked Sous Vide Brisket every time. From choosing the right cut of meat, to seasoning and cooking times, we’ll cover all the essential aspects of cooking Sous Vide Brisket, so you can impress your family and friends with a mouthwatering meal that they won’t forget.

So, let’s dive into the world of Sous Vide Brisket and learn how to make a truly delicious meal that everyone will love!

sous vide brisket
Nothing beats the rich and savory flavor of Sous Vide Brisket. It’s simply irresistible! ????

Ingredients :

  • 4-5 lb beef brisket
  • 3 tablespoons kosher salt
  • 2 tablespoons smoked paprika
  • 2 tablespoons onion powder
  • 2 tablespoons garlic powder
  • 1 tablespoon black pepper
  • 1 tablespoon dried thyme
  • 1 tablespoon dried rosemary
  • 1/4 cup olive oil

Equipment :

Instructions :

  1. Preheat your sous vide machine to 155°F (68°C).
  2. In a small bowl, mix together the kosher salt, smoked paprika, onion powder, garlic powder, black pepper, dried thyme, and dried rosemary.
  3. Season the brisket generously with the spice mixture, making sure to cover all sides.
  4. Place the brisket in a large, heavy-duty ziplock bag, and pour in the olive oil. Seal the bag, pressing out as much air as possible.
  5. Place the bag in the preheated water bath, making sure that the brisket is fully submerged. Cook for 24-36 hours, depending on the thickness of the brisket.
  6. After the cooking time has elapsed, remove the bag from the water bath and transfer the brisket to a plate or cutting board.
  7. Preheat a grill or cast-iron skillet over high heat. Sear the brisket for 1-2 minutes per side, until a nice crust forms.
  8. Slice the brisket against the grain and serve immediately.

Tips for a Delectable Sous Vide Brisket :

  • Choose a high-quality brisket from a reputable butcher. Look for one with a good marbling of fat for optimal flavor and tenderness.
  • Be sure to season the brisket generously with the spice mixture. The spices will infuse into the meat during the sous vide cooking process, resulting in a deliciously flavorful brisket.
  • Use a large, heavy-duty ziplock bag to prevent any leaks or spills during the sous vide cooking process.
  • Sear the brisket after it has been cooked sous vide to create a nice crust and add extra flavor to the meat.
  • Let the brisket rest for a few minutes before slicing to allow the juices to redistribute and prevent the meat from drying out.

Biolomix Sous vide cooking is an excellent way to achieve perfectly cooked brisket every time. The slow and low cooking process results in a tender and juicy cut of meat that is packed with flavor.

Sous vide brisket is a delicious and foolproof recipe that is sure to impress your family and friends. With the right ingredients, equipment, and tips, you can achieve a perfectly cooked brisket every time. So why not give it a try and elevate your next BBQ or dinner party?

Sous Vide Guinness Beef Stew: The Ultimate Comfort Food Recipe

There’s something special about a warm, hearty bowl of stew that makes it the perfect comfort food, especially during the colder months. And if you’re looking to take your stew game to the next level, then look no further than this Sous Vide Guinness Beef Stew recipe.

Sous vide, a cooking method that involves vacuum-sealing food and cooking it in a precisely controlled water bath, is a game-changer when it comes to making tender, juicy, and perfectly cooked meat. And when combined with the deep, rich flavors of Guinness beer, the result is a truly unforgettable Guinness beef stew that’s sure to become a favorite in your recipe arsenal.

In this blog post, we’ll walk you through step-by-step instructions on how to make this mouthwatering Sous Vide Guinness Beef Stew recipe. We’ll cover everything from selecting the right cut of beef to adding the perfect blend of vegetables and seasonings, so you can create a dish that’s both delicious and impressive.

Guinness beef
Get Ready to Savor Every Bite of This Mouthwatering Beef Stew. ????

Ingredients :

The ingredients you’ll need are listed below.

  • 2 pounds beef chuck roast, cut into 1-inch pieces
  • 1 large onion, chopped
  • 2 large carrots, peeled and chopped
  • 2 celery stalks, chopped
  • 4 garlic cloves, minced
  • 1 tablespoon tomato paste
  • 1 tablespoon flour
  • 1 tablespoon Worcestershire sauce
  • 2 cups beef broth
  • 1 cup Guinness beer
  • 2 sprigs fresh thyme
  • 2 bay leaves
  • Salt and pepper, to taste
  • 2 tablespoons olive oil
Sous Vide Container 11L
Vacuum Packer Bag – 20 Pack

Equipment :

Instructions :

  1. Preheat your Biolomix Sous Vide Cooker to 165°F (74°C).
  2. Season the beef with salt and pepper.
  3. In a skillet or Dutch oven, heat the olive oil over medium-high heat. Sear the beef on all sides until browned, about 5 minutes.
  4. Remove the beef from the skillet and place it in a vacuum-sealed bag.
  5. In the same skillet, add the onion, carrots, celery, and garlic. Cook until softened, about 5 minutes.
  6. Add the tomato paste and flour to the skillet and stir until well combined.
  7. Add the Worcestershire sauce, beef broth, and Guinness beer. Stir well.
  8. Transfer the skillet contents to a vacuum-sealed bag with the beef.
  9. Add the thyme and bay leaves to the bag.
  10. Seal the bag using a vacuum sealer and place it in the water bath.
  11. Cook the beef stew in the water bath for 24 hours.
  12. After 24 hours, remove the bag from the water bath and open it.
  13. Remove the beef and set it aside.
  14. Strain the liquid from the bag into a large saucepan.
  15. Bring the liquid to a boil and reduce the heat to low. Simmer for 10-15 minutes or until the liquid has thickened.
  16. Serve the beef stew in bowls and pour the thickened sauce over the top.

Tips to Prepare Perfect Guinness Beef Stew :

  • Use a good quality beef chuck roast for the best flavor and texture.
  • Don’t skip the searing step, as it adds extra flavor to the beef.
  • Be sure to use a vacuum sealer to prevent water from entering the bag during cooking.
  • Add more beef broth or water if the liquid has evaporated during the cooking process.
  • Serve the beef stew with mashed potatoes or crusty bread for a complete meal.

The Biolomix Sous Vide Guinness Beef Stew is the perfect comfort food recipe for the colder months. The sous vide cooking method allows the beef to cook slowly and evenly, resulting in a tender and flavorful stew that is sure to impress. The combination of Guinness beer and beef broth creates a rich and savory sauce that pairs perfectly with the beef and vegetables.

Whether you’re hosting a dinner party or simply looking to warm up on a cold winter night, this Sous Vide Guinness Beef Stew recipe is the ultimate comfort food that’s sure to satisfy your cravings. So, grab your apron and get ready to impress your taste buds with this flavorful and comforting dish!

chicken drumsticks

Sous Vide Chicken Drumsticks: A Low-Effort, High-Reward Meal Solution

Sous vide cooking has gained immense popularity among home cooks and professional chefs alike due to its ability to produce consistently delicious and perfectly cooked meals. One of the most beloved and versatile cuts of meat is chicken drumsticks.

However, achieving the perfect texture and flavor can be a daunting task, especially for those who are not experienced in the kitchen. Fortunately, sous vide cooking provides a low-effort, high-reward solution for cooking chicken drumsticks to perfection. In this blog post, we’ll explore the benefits of sous vide cooking and share our tips and tricks for making mouth-watering chicken drumsticks using this method.

Whether you’re a seasoned cook or a beginner, this guide will help you master the art of sous vide cooking and impress your dinner guests with tender, juicy, and flavorful chicken drumsticks. Let’s get started and learn a delicious and simple recipe.

chicken drumsticks
The secret to mouth-watering chicken drumsticks? Sous vide cooking, of course! ????????‍????????

The ingredients you’ll need are listed below.

Ingredients :

  • 6 chicken drumsticks
  • 2 tbsp olive oil
  • 1 tbsp paprika
  • 1 tbsp garlic powder
  • 1 tbsp dried thyme
  • 1 tbsp dried rosemary
  • Salt and pepper, to taste
Sous Vide Container 11L
Vacuum Food Sealer 220V/110V

Equipment :

Instructions To Make Sous Vide Chicken Drumsticks :

  1. Preheat the water bath to 165°F/74°C using the Biolomix Sous Vide Cooker.
  2. In a small bowl, mix together the olive oil, paprika, garlic powder, thyme, rosemary, salt, and pepper to create a marinade.
  3. Pat the chicken drumsticks dry with paper towels and place them in a ziplock bag or vacuum sealer bag.
  4. Pour the marinade over the chicken drumsticks and seal the bag, making sure to remove as much air as possible.
  5. Place the bag in the water bath and cook for 2 hours.
  6. After 2 hours, remove the bag from the water bath and carefully remove the chicken drumsticks from the bag using kitchen tongs.
  7. Heat a skillet over medium-high heat and sear the chicken drumsticks for 1-2 minutes on each side until golden brown and crispy.
  8. Serve hot with your favorite sides and enjoy!

Tips :

  • To save time, you can prepare the marinade and bag the chicken drumsticks the night before and store them in the refrigerator until ready to cook.
  • If you don’t have a vacuum sealer, you can use the water displacement method to remove the air from the ziplock bag.
  • If you prefer a spicier flavor, you can add cayenne pepper or chili powder to the marinade.
  • To ensure even cooking, make sure the chicken drumsticks are fully submerged in the water bath during the cooking process.
  • You can also add other herbs and spices to the marinade, such as oregano or basil, to customize the flavor to your liking.

Sous vide cooking is a fantastic way to achieve perfectly cooked and delicious chicken drumsticks every time. With the help of the Biolomix Sous Vide Cooker and a few simple ingredients, you can create a flavorful and juicy meal with minimal effort.

By cooking the chicken at a precise temperature for a set amount of time, the sous vide method ensures that the chicken is fully cooked, tender, and never overdone. Plus, the added benefit of being able to prepare the chicken ahead of time and finish it off with a quick sear means that you can enjoy a high-quality meal with minimal fuss.

So next time you’re looking for a low-effort, high-reward meal solution, try making sous vide chicken drumsticks using the Biolomix Sous Vide Cooker. Your taste buds (and your dinner guests) will thank you!

Biolomix Sous Vide Steak – Up Your Steak Game

Sous vide is a wonderful technique for cooking steak that yields consistently delicious results. It involves vacuum-sealing the steak in a plastic bag and cooking it in a water bath at a precise temperature for a period of time, resulting in perfectly cooked sous vide steak that is evenly pink from edge to edge.

One of the key advantages of cooking steak using sous vide is that it allows you to cook your steak to a precise temperature, ensuring that it is cooked exactly the way you want it.

Sous Vide Steak

sous vide steak
Tender, juicy, and perfectly cooked: sous vide steak at its finest! ????????‍????

Nothing quite compares to biting into a properly cooked sous vide steak. It is juicy, tender, and bursting with taste. It consists of a unique flavor and is frequently served for special occasions. The sous vide technique ensures that you will always achieve the excellence you seek.

The sous vide steak is evenly cooked throughout. It has a crust on the outside, which a knife can easily cut through to expose the perfect medium-rare interior and has the ideal flavor that melts in your mouth. Here is a recipe for sous vide steak that will leave your taste buds wanting more:

Ingredients :

  • 4 ribeye steaks, about 1 1/2 inches thick
  • 2 tbsp. olive oil
  • 2 tbsp. butter
  • Salt and pepper to taste
  • Fresh thyme and rosemary (optional)
Biolomix sous vide machine

Equipment :

Instructions :

  1. Set up your sous vide machine and fill a large pot or container with water. Set the temperature to 130°F (54°C) for medium-rare steak, or adjust according to your preference.
  2. Season the ribeye steaks generously with salt and pepper on both sides.
  3. Place each steak in a separate vacuum-sealed bag, drizzle with olive oil, and add a few sprigs of fresh thyme and rosemary if desired.
  4. Seal the bags using a vacuum sealer or the water displacement method.
  5. Place the bags in the water bath and cook for 2-3 hours for medium-rare, or adjust the cooking time according to your desired doneness. (For example, 4 hours for medium or 6 hours for well-done.)
  6. Once the steak is cooked, remove it from the bags and pat dry with paper towels. Discard any herbs or liquid from the bags.
  7. Preheat a cast-iron skillet over high heat.
  8. Add the butter to the skillet and let it melt and begin to foam.
  9. Carefully add the steaks to the skillet and sear for 1-2 minutes on each side, or until a crust forms.
  10. Let the sous vide steaks rest for a few minutes before slicing and serving.
Sous Vide Steak
Tips :
  • Be sure to season the steak generously with salt and pepper before cooking.
  • Adding fresh herbs to the bag can impart additional flavor to the steak.
  • If you don’t have a vacuum sealer, you can use a Ziploc bag and the water displacement method to remove the air from the bag.
  • Be careful not to overcook the steak during the searing process, as it can become tough and dry.
  • Use a meat thermometer to check the internal temperature of the steak and ensure that it has reached your desired level of doneness.
  • Serve the steak with your favorite sides, such as roasted vegetables or mashed potatoes.
  • For the best results, use a high-quality ribeye steak that is at least 1 1/2 inches thick.

Sous vide cooking is a game-changer when it comes to cooking steak. With Biolomix sous vide machine, you can achieve perfectly cooked steak every time. By following these simple instructions, you can make a delicious steak that is tender, juicy, and full of flavor. So next time you’re in the mood for steak, give sous vide cooking a try with Biolomix!